This guide will enable you to:
1) Connect to network drives on Windows.
2) Add new network drives on Windows.
Check:
1) You know your network/email/resource booking password.
2) You are connected to the Isca network or VPN if you are off-site.
Connect to the network:
1) Click the "Start" button and choose "Computer". A new 'Explorer' window will appear.
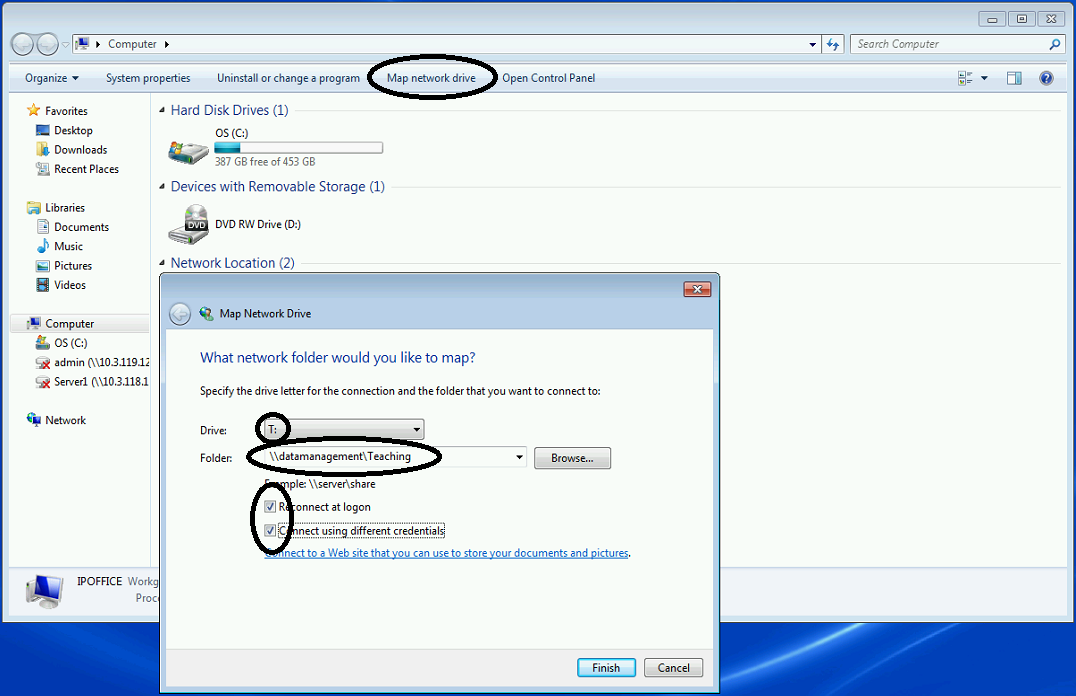
2) From the light blue bar at the top of the Explorer window, click "Map network drive".
3) Choose the drive letter which is most appropriate (see below).
4) Enter the network path of the shared folder as the folder name. NB: be sure to use backslashes (i.e. \) rather than forward slashes (i.e. /).
5) Ensure "Recoonnect at logon" and "Connect using different credentials" are ticked.
6) Click "Finish".
7) A new window will pop up asking for your credentials. Enter your username as "iscacc3\yourusername". NB: be sure to use a backslash (i.e. \) rather than forward slash (i.e. /).
8) Enter your network/email/resource booking password.

9) Click OK. The network drive will appear in the same explorer screen, available from step 1.
List of network drives and suggested drive letters
This list is not exhaustive but comprises the main and most frequently used network drives:F drive (general admin files) \\staff\admindata\admin
G drive (personal file store) \\staff\yourusername$
P drive (photos taken of work and events) \\datamanagement\6Photos
S drive (to share files with students) \\students\studentshared
T drive (teaching file store) \\datamanagement\Teaching
Y drive (public folder for scans) \\staff\scans$
Troubleshooting:
If you cannot connect to the network, ensure:
1) You know your correct, current network/email/resource booking password.
2) You have entered the drive location and your username correctly, using backslashes and not containing spaces.
3) You are connected to the Isca network.